08/01/2024
Best apps for Taking Notes on iPad, Android, Mac and PC

Note-taking is one of the best habits anyone can instill. The mere act of writing whatever you learn in lectures, seminars, and even life in general, can have a profound impact on your life.
A note-taking app is a lightweight tool that allows you to digitally record information on your device instead of writing it on paper.
You can type, draw, add images, checklists and even attach files to your notes. There are lots of modern abilities which you can check out and you will like it.
The best note-taking apps make it simple and easy to organize essential information and store it for quick access.
What's more, some note taking apps is cross-platform and works on Mac, Windows, Chrome OS, iPadOS and Android – a huge advantage since people normally use all kinds of devices. Everything is also synced across the devices.
Note-taking apps have all but taken the place of paper notes, and, with all of their extensive functions, can help you build an easily-accessible second brain.
There are now hundreds of note-taking tools available to users, But which one is the best for you? Sometimes too many options can be overwhelming.
Choosing the right note-taking app can be a daunting task, but don't worry – We have narrowed down the top 20 picks for note-taking apps to help you.
The 20 Best Note-Taking Apps in 2024
Here are 20 popular note taking apps that are widely used right now. Some are all-around great choices for every note-taking task, while others are more suited to individual or collaborative use.
1. OneNote
OneNote is a comprehensive note-taking app developed by Microsoft. It allows users to create notes in various formats, including text, images, and audio, and organize them in notebooks and sections.
2. Notion
Notion is a versatile productivity app that combines note-taking, project management, and database functionalities. It allows users to create notes and organize them in a hierarchical structure, as well as collaborate with others and track tasks.
3. Evernote
Evernote has been a popular choice for note-taking for many years. It has a wide range of features, including the ability to create notebooks, organize notes with tags, and sync across devices.
4. Obsidian
Obsidian is a great app for taking notes and organizing your thoughts. It's simple to use and has a lot of features that other note-taking apps don't have. The only downside to Obsidian is that it's not free, but it's worth the price.
5. Joplin
Joplin is an open-source note-taking and to-do app that allows for the creation of plain-text notes and supports synchronization with various cloud services. It runs on iOS, macOS, Android, Windows, and Linux.
6. Google Keep
Google Keep is a simple and easy-to-use note-taking app that integrates with other Google services, such as Google Docs and Google Drive. It allows users to create notes, lists, and reminders.
7. SimpleNote
Simplenote is a minimalistic note-taking app that allows users to create, edit, and sync notes across devices. It also supports tagging and search functionalities.
8. Standard Notes
Standard Notes is a secure and private note-taking app that offers plain-text editing, encryption, and cross-platform synchronization.
9. Zoho Notebook
Zoho Notebook is a beautiful and intuitive app that lets you create notes, lists, sketches, audio recordings and web clippings.
10. Bear
Bear is a stylish and intuitive note-taking app known for its markdown support, making it ideal for students who need to format their notes efficiently.
11. Notability
Notability is a powerful and versatile note-taking app that allows students to take handwritten notes, annotate PDFs, record lectures, and organize their notes effectively. It also supports syncing with cloud storage services like Google Drive and Dropbox.
12. GoodNotes
GoodNotes is another popular app for handwritten note-taking. It offers a wide range of pen and highlighter options, shape recognition, and advanced search capabilities to find notes quickly.
13. Roam Research
Roam Research is a powerful PKM tool designed for pro note-takers to make notes, capture ideas and most importantly connect them up using backlinks & a graph.
14. Squid
Squid is a powerful, intuitive, and delightful Android note-taking app. You can take handwritten notes just like you would on paper, but with many advantages of digital vector ink! Easily markup PDFs to fill out forms, edit/grade papers, take lecture notes, or sign documents.
15. Logseq
Logseq is a personal knowledge management tool that is not well-known, but it's one of the best note-taking apps out there.
Logseq's "interstitial journaling" approach allows for seamless integration of daily tasks and thoughts, making it a useful tool for productivity and organization.
16. Workflowy
Workflowy is a clean and distraction-free app that helps you quickly capture notes, plan your to-do's, and get organized. Simple to use, but incredibly powerful, Workflowy can help you manage all the information in your life.
17. Dynalist
Being an outliner software, Dynalist is a collaborative note-taking tool that can also help you take notes hierarchically. The software organizes information in a way that helps you with recall, much like a second brain.
18. Ulysses
Ulysses is a powerful tool perfect for Mac users who want to take their note-taking to the next level. It is a feature-rich app with a clean and simple interface, making it easy to use.
However, this tool is not freely available, hindering some people from being able to utilize it.
19. Apple Notes
The pre-installed Apple Notes app is a simple and user-friendly option for basic note-taking. It supports text, handwriting, images, and checklists and syncs across all Apple devices.
20. Dropbox Paper
Dropbox Paper is a document editor and note taking app that can be greatly beneficial in a wide range of scenarios.
Users will find Dropbox Paper's simple and distraction-free layout makes it perfect for everyday writing.
How to choose the best note taking apps?
The app you use for note-taking can have a huge impact on the quality of your notes. You need to consider some important factors before choosing.
We have assessed note taking apps for ease of use, features, organization tools, team collaboration, cloud storage, cross-platform compatibility, handwriting support, and a number of other factors.
Add all types of content
Most note taking apps allow you to add a wide variety of content to your notes. for example, with Audio recording function support, you can record sound bites from your lectures, or even an entire lecture, as a backup to your note-taking.
Using apps like OneNote you can record audio or video into a page, embed online videos and other content, clip from your screen or the web, print documents directly into your notebook and add photographs or scan documents using your devices camera and Microsoft Lens.
Organization Tools
One of the main aspects of note-taking apps is how they organize your notes. There are broadly two organizational systems that note-taking apps use: folders and tags.
Folders are what you'll likely be familiar with from Windows' File Explorer or Finder on Mac.
Tags use a different approach. You first give each note page a unique label (or tag). Then, you can find notes under a specific tag by selecting the tag name in your workspace.
Evernote utilizes a good tagging system. However, it's not the best choice for using folders, as it only offers two layers of depth: Notebooks and Notebook Stacks.
If you want a deeper hierarchy, Notion is a top choice that uses infinitely-nested folders, so you can create a fully fleshed-out structure for your notes.
Team Collaboration
If you're working with a group of colleagues, consider creating a shared online notebook so you can collectively collate notes and resources and add comments without having to physically meet up.
This means you can't lose shared material. Notes can be shared with the click of a button, and as long as they are saved or backed up it's pretty difficult to lose them.
Search Functionality
An obvious reason for you to take notes is so that you can go back and review them later. But sometimes flipping through pages of notes to find one piece of information can be frustrating.
Many note-taking apps offer search functionality where you can search for keywords and phrases to quickly find information. Some note-taking apps even allow you to search your handwriting.
Cloud Storage
If you use OneNote, your notes will be stored in your Office 365 account by default. This will make them available on any device as long as you log into the apps using your University account details.
Most other note taking apps include cloud storage too. Keeping your notes in the cloud means they're available for you to read or add to wherever you are, on any device, and there is less chance of losing them.
Write by hand
Writing by hand can be quicker for some and may feel more natural than typing.
If you have a pen tablet for note taking, you can write directly into app with a stylus, with the option of converting this to text later on.
You can also use a pen to annotate PDF or Word documents when researching or reading documents.
Most note taking apps don't offer the option to write and sketch by hand, which can feel limiting to a lot of people.
Several note-taking apps that support hand-written are OneNote, Evernote, Notability, Goodnotes, Apple Notes, and Squid.
Related Posts: Drawing Pads for Annotating PDF Documents, Best iPads for Drawing, Best Android Pen Tablets.
Price
Our picks include a mix of free and paid options to meet the needs of different users; when possible, we note when free apps also include in-app purchases and what features those extra fees unlock.
When deciding which of the note-taking apps to use, consider what your needs are.
Free and simple apps will deliver a simple experience, but for more complex feature needs you should probably look to an app with a paid for subscription.
Conclusion
Taking notes is a powerful habit to build; one that can dramatically increase your productivity and your creativity.
Note-taking apps keep your information organized and help you focus on what's most important.
We highly recommend these 20 well-known note-taking apps, each with its own strengths and features.
Whether you're looking for a simple, all-in-one solution, or something more powerful and versatile, there's an app for that.
Taking notes has never been more exciting or easier! It is a good idea to try out a few different apps and see which one works best for you.
08:14 Publié dans Autres, Bons plan, Cinéma | Lien permanent | Commentaires (0)
12/12/2023
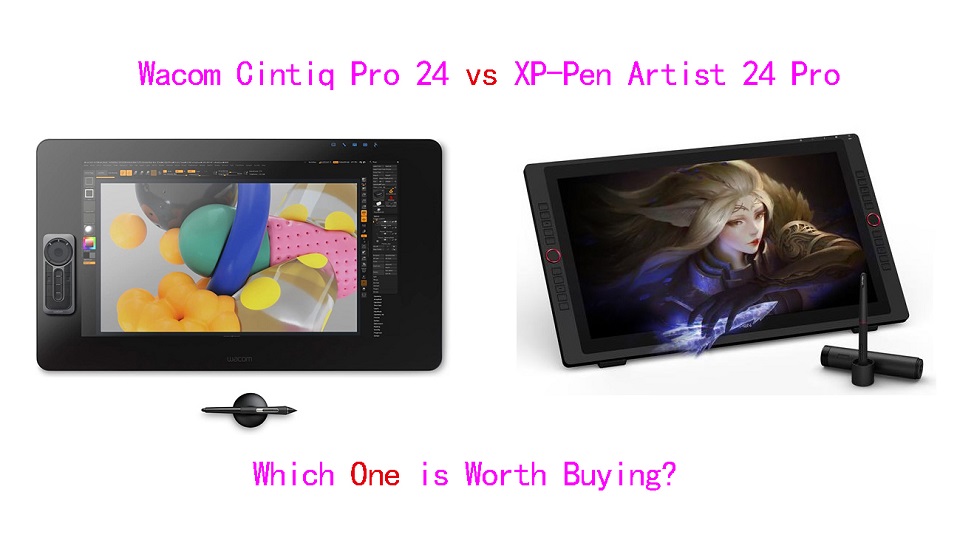
XPPen Artist 24 Pro vs Wacom Cintiq Pro 24 Comparison
Want to get serious about digital art? Want to upgrade from a non-screen tablet, a small pen display, or an old wacom cintiq model?
The 24-inch pen display monitor is a great tool for professionals and mid-level artists who want to take painting to the next level and draw directly on the big screen.
XP-Pen Artist 24 Pro is what many artists calls a budget alternative to the Wacom Cintiq Pro 24—a much more expensive and feature-rich tablet for the pro market.
Which one has better screen quality, best drawing experience & longer life span? and Which one is worth buying? Is Wacom Cintiq really better than XP-Pen Artist?
In this article, we would discuss the key differences between them and help you decide which one will fit your needs better.
Wacom Cintiq Pro 24 vs XPPen Artist 24 Pro Comparison– which one is worth buying?
Taking a closer look at the specifications of the two tablets, it gets easy to spot the key differences between them.
Below is a more in-depth analysis, These will help us better understand the pros and cons in each case.
Design and Build Quality
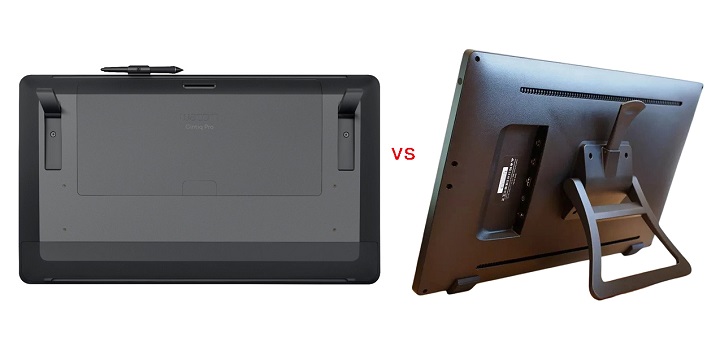
XP-Pen Artist 24 Pro is composed of a vast 23.8-inch glass screen, side buttons and an immense adjustable stand. Build quality is great and doesn't look and feel cheap.
The massive Wacom Cintiq Pro 24 feels robustly built and features a clean “minimalist” design aesthetic. You will notice that there is a lot of empty space around the 23.6-inch screen (bezels).
This leads to the tablet taking a lot more space on your table. But it's also incredibly comfortable to lay your arm on, and you can travel the full surface of the display without interrupting your pen stroke.
Cintiq Pro 24 has no ExpressKeys built into the sides like the Artist 24 Pro does. It also doesn't include an adjustable stand instead 2 folding legs at the back that will raise it up to a 20 degree angle.
Both tablets are big and heavy, less portable. If you're going to invest into a graphics tablet this size, make sure you have sufficient desk space to accommodate it.
Screen Resolution, Brightness and Color Gamut
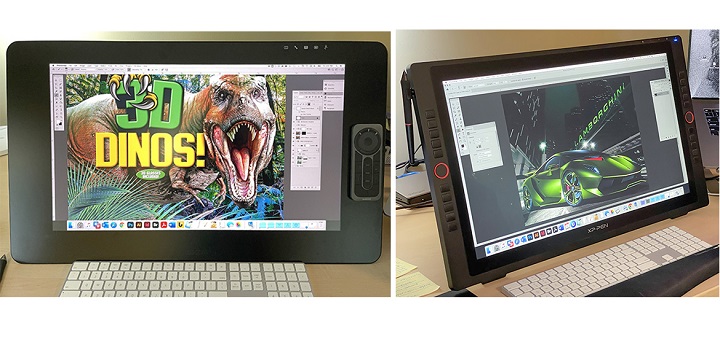
Artist 24 Pro features an IPS display with 2K (2,560 x 1,440-pixel) resolution at 123 PPI, 250 nits max brightness, 16.7M colors and 90% Adobe RGB color gamut.
The screen looks nice and sharp, Colors are bright and vibrant. you can zoom around and work on the small details of your art.
However, the Cintiq pro 24's display offers higher 4K (3840×2160-pixel) resolution at 188 PPI, a billion colors, 350 nits max brightness, and covers a wider color accuracy of 99% Adobe RGB.
This means sharper and truer color representations illustrations, photographs, and video on Cintiq Pro 24.
In addition, Wacom Cintiq Pro 24 comes with a screen calibrated in the factory, meaning that you don't have to mess around with calibration hardware.
You will likely need to perform some calibration with the XPPen Artist 24 Pro, the same as you would for a monitor.
Screen Lamination
Cintiq Pro 24's screen is fully laminated, This means an improved display quality, reduced glare, wider viewer angle, more accuracy (no cursor offset/parallax from the pen tip), and better overall usability or user experience.
In contrast, Artist 24 Pro does not come with a laminated screen, But parallax is improved with newer screen technology, which is very minimal. After calibration, you can get the pen cursor to appear directly beneath the pen tip.
Surface Texture
Surface texture makes a huge difference in your drawing experience.
This is one of the main differences between the two tablets.
Cintiq Pro 24 has a matte etched glass surface, whereas the Artist 24 Pro uses a matte screen protector.
The etched glass will have a bit more paper-like texture, and even less slippery. Matte screen protectors are less durable, and have a much slicker feel.
Multi-Touch
It is worth noting that the XPPen Artist 24 Pro is not a touch screen.
There are two models of the Cintiq Pro 24, with and without multi-touch. The touch version costs $500 more than its sibling.
The most useful gestures were two-finger actions: pinch to zoom in / out and rotating the canvas. These two commands worked almost flawlessly.
But any action that required more than two or three fingers became quite cumbersome. of course you can always disable them by press the button.
Wacom Pro Pen 2 vs XPPen PA2 Stylus
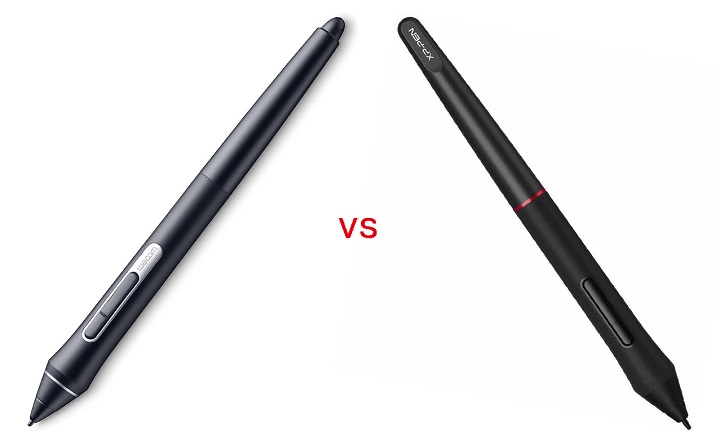
Wacom Pro Pen 2 and the XPPen PA2 stylus look very similar to each other. They both have a rubber grip at the front body for a better hold.
Wacom pen has two buttons on the side and an eraser at the back whereas XPPen stylus has two side buttons with no eraser at the back.
XPPen Pa2 stylus is light and more front heavy. Wacom pen is more back heavy and more heavily weighted in general.
Both styluses are battery-free, doesn't require charging, supports 8,192 levels of pressure sensitivity and 60 degrees of tilt recognition.
This means that it's easy to draw a line that smoothly varies between thick and thin as pressure is applied—or not—much like a brush.
The main difference was that XPPen PA2 stylus seems to take slightly more initial activation force than Wacom to draw, Tilt sensitivity is also sometimes a bit flaky.
In contrast, Wacom Pro Pen 2 feels more natural and accurate, it responds more predictably to the pressure you apply to it.
Overall the XPPen PA2 is a good stylus, but the Wacom Pen offers better drawing experience.
Shortcut Buttons
The Artist 24 Pro has two sets of keys, a red roller wheel and ten buttons on each side, making life equally convenient for lefties, righties, and the ambidextrous.
They mirror each other, so there are a total of 20 programmable keys and 2 dials. These are all on the outside, slightly raised.
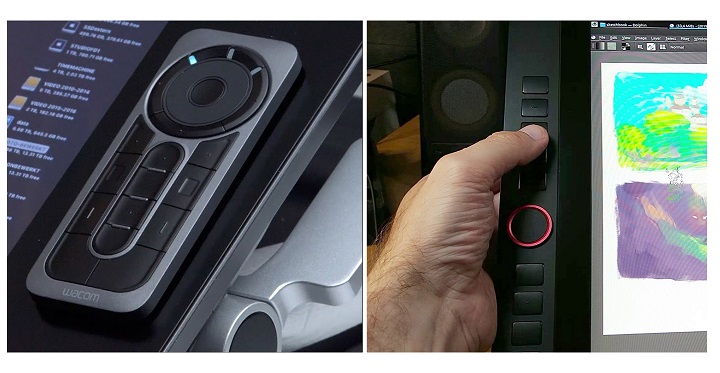
The Cintiq Pro 24 has no Express Keys, But it comes with a wireless Express Key Remote via 2.4GHz Wifi.
This hand-held device provides 17 programmable shortcut function keys while working. There's a rotation wheel at the top that allows zooming in and out (or other customizable functions).
The remote is perfectly balanced for either right or left-handed people. It will magnetically stick to either side of the display keeping it handy at all times.
Compatibility and Connectivity
Both Cintiq Pro 24 and Artist 24 Pro are compatible with the popular operating systems Windows, Mac and Linux. They works well with a multitude of software packages that range from popular professional suites such as Photoshop and ZBrush, to freeware such as Krita and Blender.
The Cintiq Pro 24 and Artist 24 Pro can be connected as a display through HDMI, or USB-C, if your computer supports the ports.
If you are connecting the display through HDMI, you'll also need to connect one cable for power, and an additional USB-A cable for the pen data transmission, total 3.
The USB-C connection only requires 2 cables: a single USB-C cable + one cable for power.
Drivers & Software
Both units come with windows, mac and linux drivers to communicate with your computer. You need to download them from their official site.
The driver from Wacom is one of the most reliable options on the market. It comes with some advanced shortcut controls that are easy to understand and quick to setup.
The driver from XPPen may not be as advanced as the Wacom driver and may count more issues in some cases. but nothing you couldn't work around or just ignore.
XPPen driver has plenty of customization options. You can use it to customize physical shortcut buttons, calibrate the onslaught of the pen and screen, set the work area and export / import your settings.
Something we did notice is that both Wacom and XPPen driver software have 3-point calibration for the stylus' pressure sensitivity, which is great to get your pressure just right.
Tablet Stand & VESA Mount
The size of these 2 tablets are massive, so be prepared to make a bit of desk space available.
If you don't have much desk space, you might need to buy a VESA mount or arm to hold up the monitor in a comfortable position to draw on.
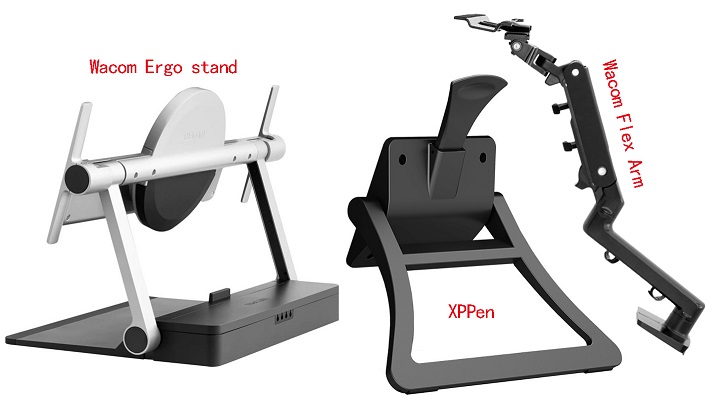
Artist 24 Pro's adjustable stand is strong, wobble-free, and already attached. Both the stand and bottom of the display have rubber feet to help prevent slipping on a desktop—a thoughtful touch.
The stand uses a standard 100 x 100 mm VESA mount, so it can be easily removed for attaching the display to a VESA arm mount if desired.
Even though Cintiq 24 Pro does come with the 2 legs to help prop it up, it’s still not enough. Having to hunch over when you draw/animate does numbers on your back.
Luckily, An optional $500 Wacom Ergo stand or $400 Wacom Flex Arm is available - It has an unique 80x495mm hole pattern at the back.
Wacom Ergo stand has raise, tilt and rotate mechanisms for adjustable positioning, so you can change angles easily while working on complex illustrations.
The Flex Arm allows the Cintiq Pro 24 to be positioned just about anywhere you want at any angle you want.
Wacom Pen Stand vs XP-Pen Pen Holder
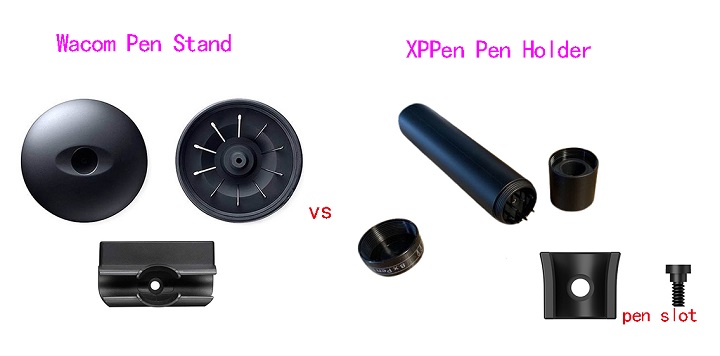
Cintiq Pro 24, comes with a pen stand, which is shaped like a donut. It allows you to keep your stylus in a horizontal or vertical position when not in use.
Opening the top cover you get a total of 10 extra pen tips: 6 standard and 4 felt. There's also an extra pen holder that snaps to the top of the display.
With Artist 24 Pro, you get a cylindrical pen holder, which works as a pen storage.
The front cap of the pen holder works as a pen stand, while the rear cap of the pen holder provides safe storage space for 8 extra standard Pen nibs.
There's also a small plastic pen slot that screws into the side of the tablet to hold the stylus safely.
Cooling
There is an intermittent fan regulates the temperature of the Cintiq 24 Pro. The fan speed varies depending on the demands placed upon the monitor. Fan is quite loud at times.
XPPen Artist 24 Pro has no fans, so it is quiet with zero fan noise, which will certainly help users stay concentrated without the droning.
Price
The Artist 24 Pro retails for about $899 USD and Wacom's Cintiq Pro 24 sells for $1,999! That's quite the price jump to account for.
So let's just get this right out in the open. There are a lot of people who are looking for cintiq alternatives as Wacom's tablets are expensive.
Besides,The Huion Kamvas Pro 24 (4K) with cheaper price is also really excellent and almost as good as wacom cintiq Pro 24.
Related Posts: XPPen Artist 22R Pro vs Wacom Cintiq 22 Comparison, Wacom Cintiq Alternatives, PDF Annotating Tablets.
Conclusion
While it may be bigger than you'd need, The 24-inch pen display is generous enough to feel the freedom of drawing and move your hand with the pen around the screen without any problem.
The Wacom Cintiq Pro 24 simply outdoes the XP-Pen Artist 24 Pro in all aspects because it offers extra features like multi-touch, higher pixel density, longer warranty - 2 vs 1 year, etc.
Only downside is that it's expensive. If you're a serious artist, designer or 3D modeller, and money is no object, you'll struggle to do better than the Wacom Cintiq Pro 24.
The XP-Pen Artist 24 Pro offers amazing value for the money, with everything you'd need to take the next big step in their creative journey. And the price is more than acceptable for most artists.
Ultimately, It really depends on your budget, preference, needs and skill levels. We noticed that for many beginner artists using the Cintiq Pro 24 is unnecessary. Some of them don't even use the advaned features.
We look forward to seeing how Wacom, and XP-Pen will continue to grow their product line with graphic displays that can attract larger demographics.
Source: https://pctechtest.com/wacom-cintiq-pro-24-vs-xppen-artis...
07:06 Publié dans Bons plan | Lien permanent | Commentaires (0)
08/12/2023
Beginner Guide to Become a Digital Artist
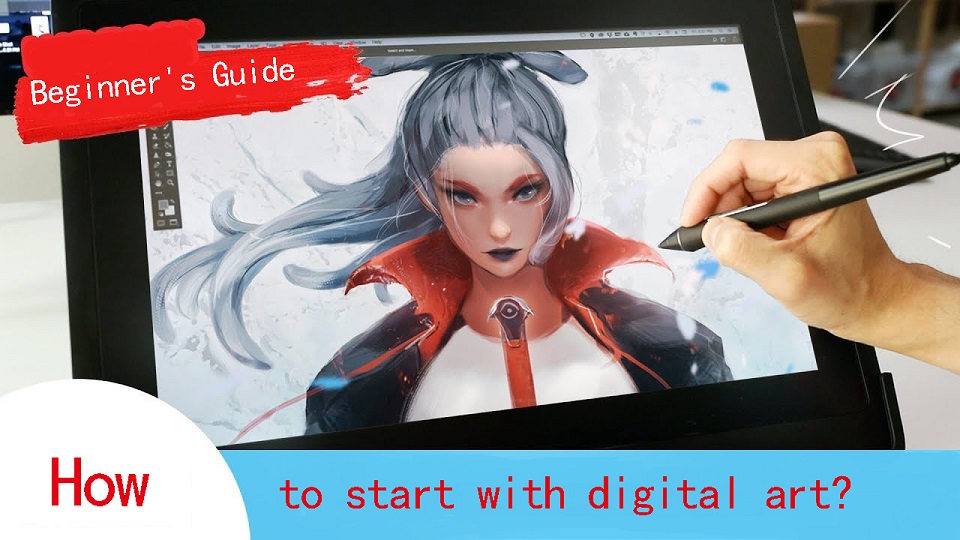
Nowadays, it seems that digital art is everywhere on the internet. There are dozens of types of digital art, ranging from digital painting to 3D animation.
Have you ever wondered how you can turn your creative ideas into stunning digital art? Anyone can be an artist in this digital age.
But getting started can be overwhelming. How do you begin? Fear not— it's easier than you think!
By providing an easy-to-follow beginner guide to start digital art, this article empowers newcomers to understand the types of digital art, choose the right tools and software, and where you can proudly display your masterpieces.
What is digital art?
Digital art is a contemporary artistic medium that encompasses a wide range of creative works produced using digital technology.
It is the fusion of traditional art techniques with the digital tools and techniques made available by computers, graphic tablets, and software applications.
Digital artists use these tools to create, manipulate, and enhance their artwork, resulting in a diverse spectrum of visual expressions.
The fundamental characteristic of digital art is the use of a digital canvas, such as a computer screen or graphic tablet, combined with digital drawing tools like styluses and pens.
This allows artists to paint, draw, sculpt, and design with remarkable precision, flexibility, and efficiency.
The artistry in the digital realm comes to life through the manipulation of pixels, vectors, and layers, making it a versatile and dynamic medium.
Different types of Digital Art
There are many different types of digital art, including animation, drawing, photo manipulation, 3d modeling, and more.
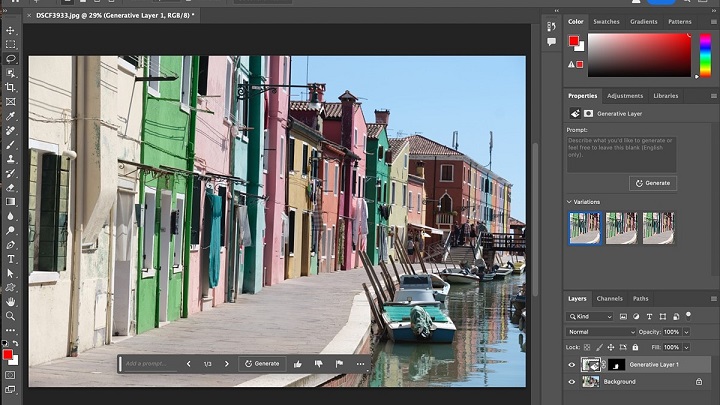
1. Photo Manipulation
Photo Manipulation is pretty simple — editing an image to whatever you want it to look like. Since you're using photos, this is a pixel-based, or raster, type of digital art.
There are subtler versions of it, like touching up a family portrait and fixing lighting and a few facial blemishes, and more prominent versions of photo manipulation, like combining a picture of a pirate ship and some planet images into a space pirate sci-fi scene.
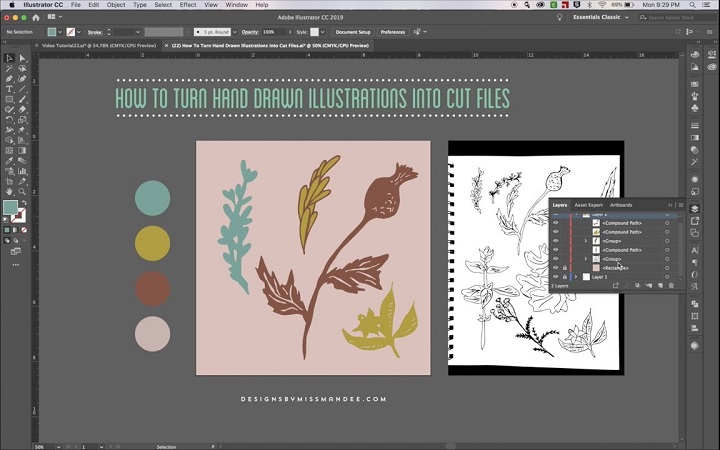
2. Digital Illustration
Digital illustration, graphic design, and vector art is all around you, even if you don't notice it. It's in apps and app icons, websites, manuals and brochures, and even books.
This type of digital art is made of shapes all layered together to create an image like a flat illustration — shape/vector based, not pixel based. It's often used for branding and logos, and creates clean and crisp art.
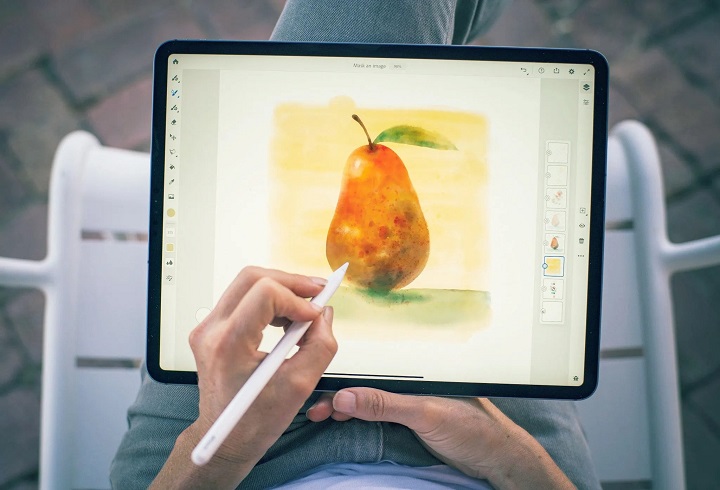
3. Digital Painting
Digital painting is probably what pops into your mind when someone says ‘digital art'. It's raster/pixel-based, like photo manipulation, but unlike photo manipulation, which combines and edits images to bring them together.
with digital painting, you're creating something from a blank canvas. It's basically just drawing/sketching/painting digitally, and usually depicts characters, landscapes, and scenes.
4. Animations
Moving images or a series of drawings that come together to create motion. This includes everything from animated movies to GIFs you see online.
5. 3D Art
3D art is becoming more and more popular — it's graphics are being used in websites, apps, and interfaces in every category and subcategory.
3D modeling also has a huge role to play in the video game industry, as well as animated shows and movies. 3D models are digital objects that can be rotated and viewed from all angles. They're often used in games, movies, or product designs.
Choosing the hardware to get started with digital art
First thing you'll need when you want to get started making digital art, is hardware. There are two main options: computer + drawing tablet, standalone pen tablet.
1. Computer
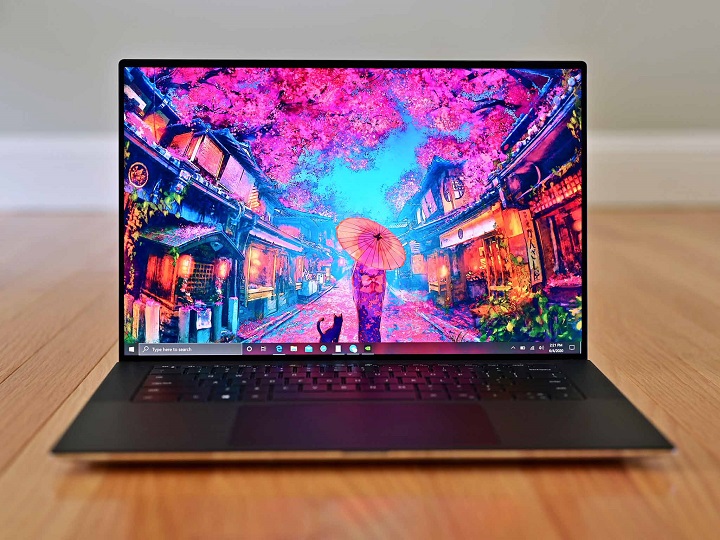
If the art program is heavy, your computer may use too many resources and you may end up getting lags while drawing.
This depends on the specifications of your computer; if it is a high-end one with the best in class CPU, GPU and copious amounts of RAM, then no need to worry!
Depending on your software, you would generally want a computer with:
-At least 16GB of RAM
-A discrete GPU separate from your CPU
-At, least an Intel Core i5 or Ryzen 5, or something equivalent
-You can also ignore all of these if you have a apple Mac with the M1 or M2 Processor.
2. Drawing Tablet
You can make digital art with a mouse, But a pen tablet with pressure sensitivity will give a much more natural feel when drawing.
Some things you want to focus on are: Drawing surface size, Pen, Pressure sensitivity, Express Keys, and Price.
There are two main categories of graphics pads for beginners: tablet without screen, tablet with display.
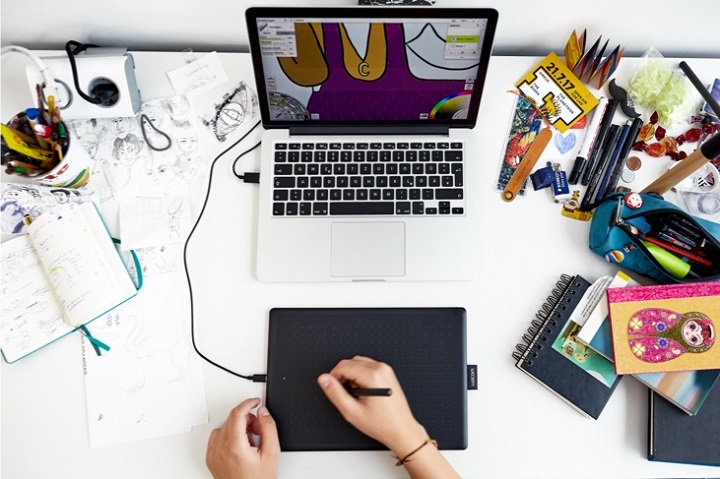
A non-screen graphic tablet have two components: a touch-pad, and a stylus. It works a bit like a mouse and needs to be attached to your PC or laptop.
In order to use the tablet, one needs a good sense of hand-eye coordination. These types of tablets are usually cheaper, but offer everything you would need to draw digital art.
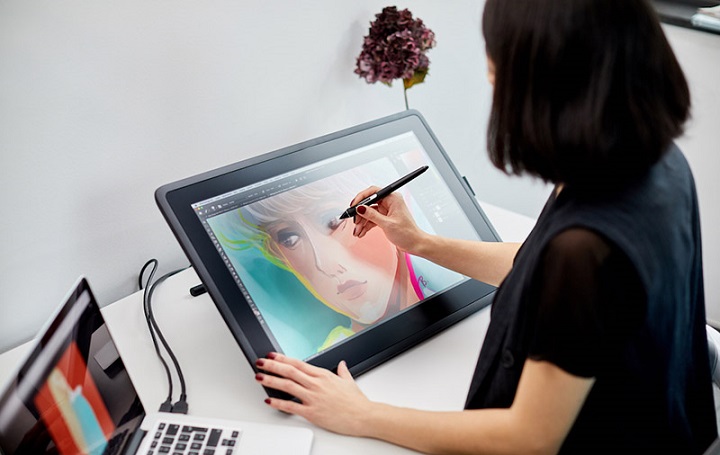
Display tablets function like graphic tablets, but with a built-in monitor. You can draw directly onto a screen, which feels more intuitive, accurate and nature.
They are usually $200+ more expensive than graphics tablets, size range from 10-inch to 32-inch. But they still need an extra laptop or computer to plug your tablet into – these are essentially a screen monitor.
There are a number of brands for Drawing tablets, but the good 3 name brands you need to know are: Huion, XP-Pen or Wacom. Most tablets that these have to offer are really good, some being more expensive than others.
Wacom was meant for professionals, hence it has an expensive price. Huion and XP-Pen are brands generally bought by beginners and enthusiasts, because they have really good value for money. Other Best Wacom Alternatives include Veikk, Gaomon, and Ugee.
3. Standalone Pen Tablet
You can always use other standalone tablets, like the famous Apple iPad Pro (iPad OS), Microsoft Surface Pro (Windows) or Samsung Galaxy Tab lineup (Android).
All these tablets have pen input support, in-built computer and screen, This makes them very portable – you can take them anywhere, such as sketching on the couch or out in a cafe.
The downside is that they are more expensive, and you have a very limited selection of software available to you.
Choose a digital art software that suits you
This can be drawing software, or it can be 3D modeling software, or even animation software. Whatever works for you.
Each program has its unique strengths and features that can enhance your ability to create your own digital art.
Also, the choice of digital art software depends on your hardware and operating system, because not all software is compatible with all devices.
1. Photo Editing Software
To get started with photo manipulation, you need a photo editing program. While the industry standard is Adobe Photoshop, it's monthly recurring fee can be a bit steep for those just starting out.
Affinity Photo is a powerful and affordable image editor that is directly competing with Photoshop for enthusiasts and professional users.
A great free alternative that still has great function and a good amount of online tutorials is the desktop software GIMP.
Photopea, Canva or Pixlr Editor is perfect if you want to have a browser-based, online way to edit your photos.
2. Digital Illustration Software
As for Digital Illustration software, the most popular digital illustration app is Adobe Illustrator, but as with Photoshop, it's monthly cost isn't all that appealing to beginners.
Coreldraw is another popular Illustration software for print ready graphics and illustrations, the UI is very user friendly and easy for graphics designers.
In terms of function and style, Affinity Designer is an impressive, low-budget alternative to Adobe Illustrator.
Good free alternatives to Illustrator is Inkscape, great to draw beautiful drawings, very fast and light weight.
3. Digital Painting Software

Many artists use Photoshop for digital painting because of Photoshop's wide range of brushes and tools, but there are also some other great alternatives with a cheaper price tag.
If you want to get into digital painting without spending a few hundred dollars every year. This includes Clip Studio Paint, Procreate, Corel Painter, Paint tool SAI, Sketchbook, and free drawing apps like Krita, Medibang Paint, Firealpaca, Mypaint, Artweaver, etc.
4. Animation Software
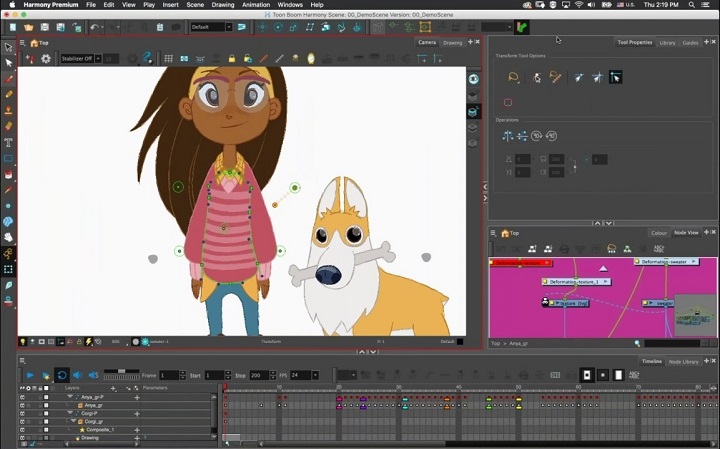
2D Animation Apps: For those who like drawing and creating 2D animation, Toon Boom Harmony, Adobe Animate, Moho Pro, Synfig Studio, Opentoonz, Pencil2D and TVPaint are all well-known and high-quality animations tools.
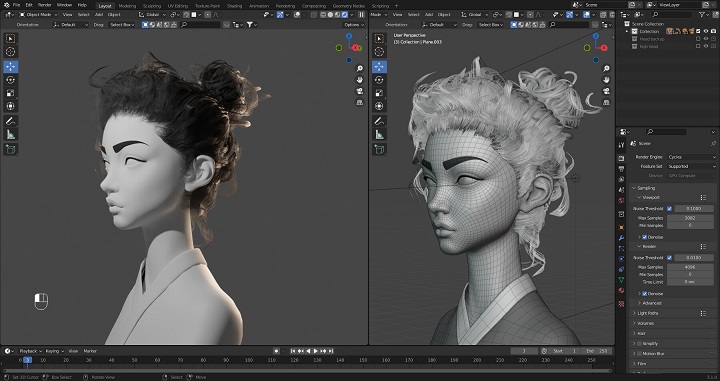
3D Animation Programs: For 3D animation, Start with any of the software - Blender , 3ds Max, Autodesk Maya, Cinema 4D, Houdini, Modo, Daz Studio, Cascadeur any one of them .
5. 3D Modeling Software
Maxon Cinema 4D, Autodesk Maya and 3DS MAX are three of the most famous 3D modeling software which artists and studios often use in many fields.
Pixologic ZBrush is a digital sculpting tool that combines 3D/2.5D modeling, texturing and painting.
Blender is the most popular 3D creation platform which is free, open-source and powerful. It supports the entirety of the 3D pipeline—modeling, rigging, animation, simulation, rendering, compositing and motion tracking, even video editing and game creation.
How to start Digital Art?
If you guys are a complete beginner with no art experience you should start with drawing by traditional methods first(pen and paper method).
We know that this is not the thing you were expecting but at least do some basic exercises which will give you the flow to draw in the drawing tablet or a iPad or any other gadgets you name it and it requires the skills.
Practice the Art
After getting comfortable with the basics, hardware and software, start your art journey by practicing art.
First choose your Niche or art of your interest and start working towards it. because in the field of art you will improve only when you practice daily or at least practice two to three days a week.
Once you started practicing you will see the results as time goes by and trust us guys it will give you a satisfaction which makes you happy and gives you motivation to draw more and practice more.
Best Digital Art Sites to Share Your Artwork
In the digital world, authenticity and connection are key.
Are you ready to show the world your artwork? These well-known online art sites are the right places to share and explore new digital art Ideas:
DeviantArt: The place to discover millions of works of art in every shape, size, and style. You can also join art tribes and make your voice heard.
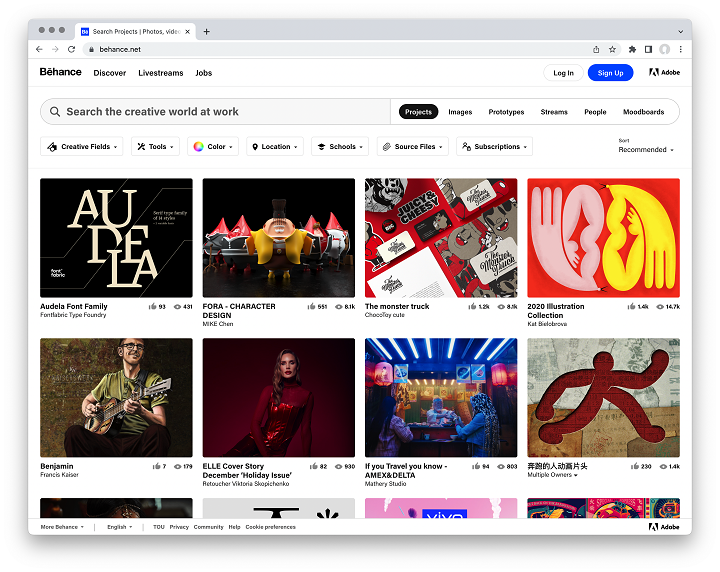
Behance: Here you can exchange ideas with other digital artists, show off your portfolio, and let the community boost your creative ego.
ArtStation: For professionals and aspiring artists alike, especially those in gaming, film, and entertainment. Show them what you've got!
Dribbble: If you are interested in digital design, illustration, or animation, this is your stage to shine. It's also a place where you might land a gig.
Pinterest: Here you'll find an endless treasure trove of ideas and inspiration for all your digital art projects. Create boards, save pins, and unleash your creativity.
Medium: Not just for reading, but also your platform for sharing your stories, especially those related to digital art. Immerse yourself in the world of Blogging Guide, Digital Art, and Pixel Vision.
In addition, Utilize social media to your advantage. Share your art on platforms like Instagram, Facebook, and Twitter. Engage with your audience, and post behind-the-scenes glimpses into your creative process.
Conclusion
We hope our post gave you a better guide on digital art. Enjoy the process and not the destination so that you will feel the satisfaction guys.
Getting started with digital art can feel like an overwhelming task, but don't let the stress get to you.
Adjust your expectations, and watch some tutorials. Your goals won't seem so formidable once you get the hang of things.
If you can do that, you'll be well on your way to mastering a new skill set.
Source: https://pctechtest.com/beginner-guide-to-start-digital-art
13:30 Publié dans Autres, Bons plan | Lien permanent | Commentaires (0)